
There are some points to consider before using demo content:
- Default plugins are installed and activated.
- Demos content should be installed in a fresh installation of WordPress.
- Some images are copyrighted. We do not have the right to include some images of demos in the content due to copyright issues, so images will look different from the demo.
The easiest way to import our demo content is to use the “Ruby Importer“. This is the 1-click importer demo tool that allows you can import any demo or parts of demos.
1-Click to import demos with Ruby Importer.
Using this tool is recommended for fresh installs. Ruby Importer will not replace existing content but it will merge your current content with demo content.
We always recommend running it on a fresh WordPress installation and no extra plugins active.
These features will import Content, Theme Options and widgets. Be patient until the installation is complete. It may take several minutes on some web hosts.
At this stage, several automatic steps happen:
- Import media content to your server
- Import post/page data to your server
- Import menu to your server
- Import theme options to your server
- Import widgets to your server
Check the System Status to ensure your server meets the requirements for a successful import.
Import Demo
- Make sure to have installed and activated default plugins: Pixwell Core and Pixwell Importer.
- Navigate to Appearance → Ruby Import Demos.
- Select a demo you would like to import.
- Check all recommended plugins for that demo, Recommended activating all plugins, that will allow your website to get much data as possible.
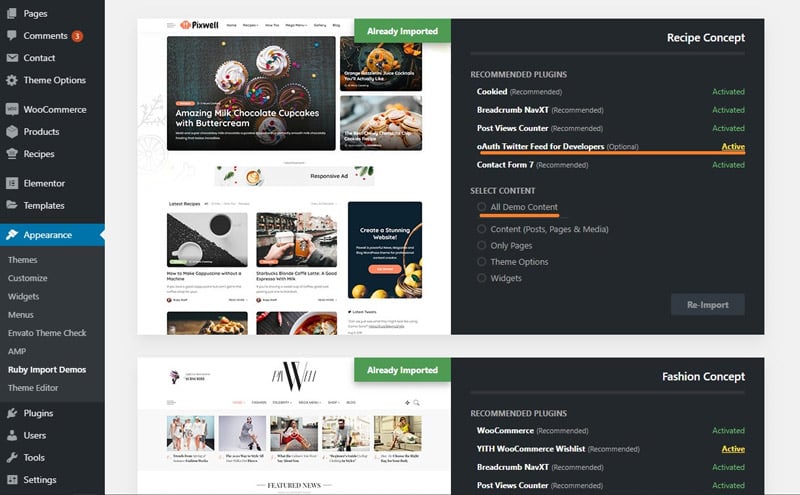
- Click on “All Demo Content” to select data to import, You can select a part of contents: post, pages & media, only pages, or only theme options, widgets.
- Click on the “Import Demo” button.
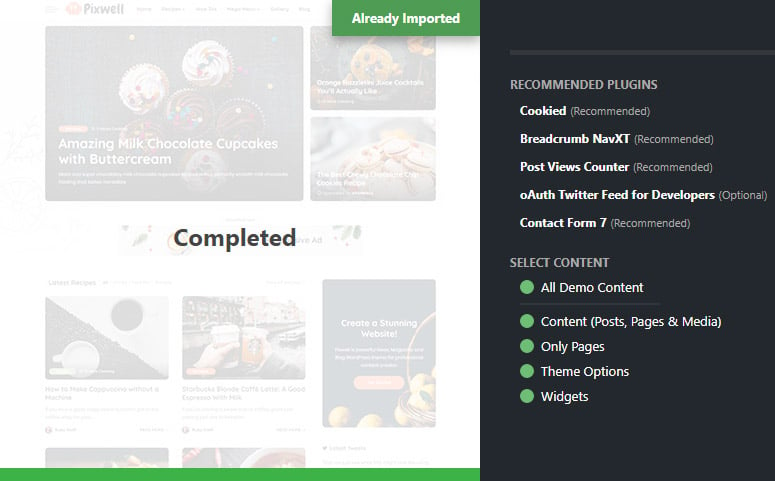
- Wait until the import process is completed. Please be patient and don’t navigate away, as this can take a few minutes depending on your host’s performance.
- You will be notified once the process is completed.
- After the successful installation, navigate to the Theme Options panel and click on the “SAVE CHANGES” button at the top right of the theme options panel to make sure everything will work smoothly is as.
Fallback Method: Manual Import
The theme comes with a .xml file containing demo content you can import into your WordPress site. In case something went wrong with automatic demo import, you can import content manually.
Go to ThemeForest Download Page and download All files & documentation, then unzip this archive and in the demo-content folder, you can locate all demo content files.
- all-content.xml: this file includes posts, pages, menus, and media.
- only-page.xml: This file includes pages.
- theme-option.txt: this file used to import theme options settings.
- widget.wie: this file used to import widgets.
Import XML content:
- Navigate to Tools → Import.
- Click on WordPress link (if the Importer plugin is not installed, install it).
- Select the content.xml file located in the archive which you have downloaded from ThemeForest and click Upload file and import button. It will take a few minutes to install and upload all content.
- After finished, Navigate to Appearance -> Menus -> Menu locations then assign Menu for menu and then click Save.
Import Theme Options:
- Select the theme-option.txt file located in the archive which you have downloaded from ThemeForest. Open this file with TXT editor, select all text and then copy it.
- Navigate to Theme Options → Imported/Exported. Click Imported from the file. and then paste the text you have just copied. And then, click the Import button.
That’s all.
Import Widgets:
- Install and active plugin: Widget Importer & Exporter
- Navigate to Tools → Widget Importer & Exporter
- Click on the Import link.
- Select the widgets.wie file located in the archive which you have downloaded from ThemeForest and click the “Upload file” button.
- Click the Import button.
Setup HomePage:
- Navigate to: Dashboard > Settings > Reading
- At the “Your Home Displays” option select “A static page”
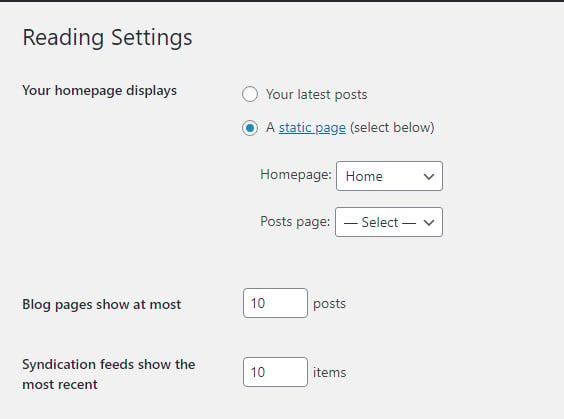
- At the “Homepage:” dropdown, Please select the home page.
Troubleshooting
99% of issues when importing demo due to web hosts, Below is a list of common issues which you may face during demo installation:
Ruby Importer could not complete the process.
The issue happens when PHP maximum execution time is less than the theme requirements. Please read this article to increase your server maximum execution time to the recommended value: Configuring Server Settings
- Reload the import page and try to re-import.
- Change the php.ini config and try to re-import.
- Switch to manual import method
One-click import stuck at 99%
The issue happens when PHP max input vars are less than the theme requirements. Please read the article to increase your server max_input_vars to the recommended value: Configuring Server Settings.
Error 504 (Gateway Time-out)
The issue happens when PHP maximum execution time is less than the theme requirements. Please read this article to increase your server maximum execution time to the recommended value: Configuring Server Settings
Other issues
If you faced any other issues or cannot import, please contact us via Support.
Demo Images
All images are copyrighted and they don’t include demo content. If you need to use any of them on your website, you need to acquire the appropriate license.