
Pixwell supports custom WordPress menus, with multiple levels of the dropdown. There are 4 areas where you can display your menus.
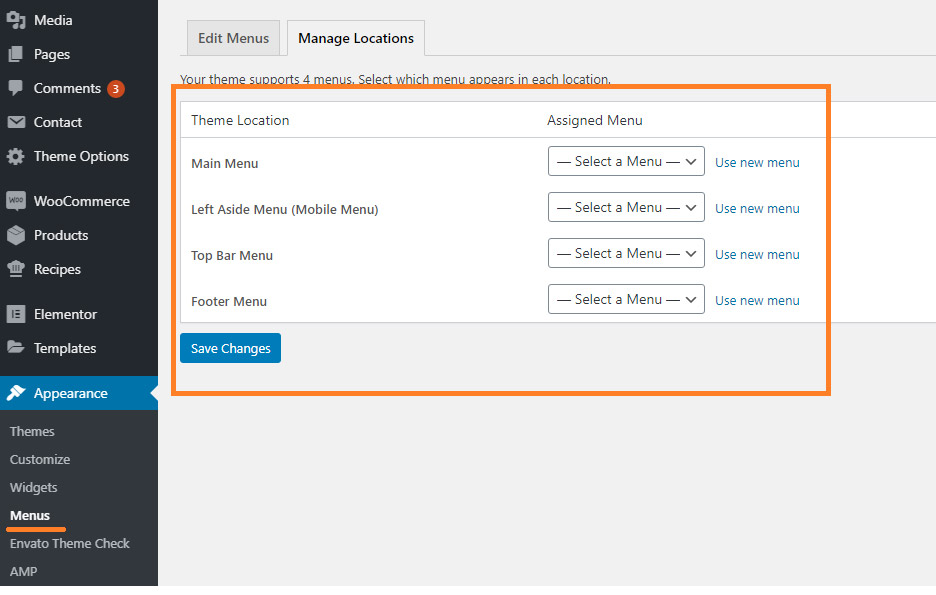
Navigate to Appearance > Menus.
Click on the “Manage Locations” tab to see all locations.
- Main Menu: this is the main menu area at the header.
- Left Aside Menu: This is the menu area on the left side, it is used for displaying the menu on mobile devices.
- Top Navigation: This is the top bar menu area.
- Footer Navigation: This is the footer menu area.
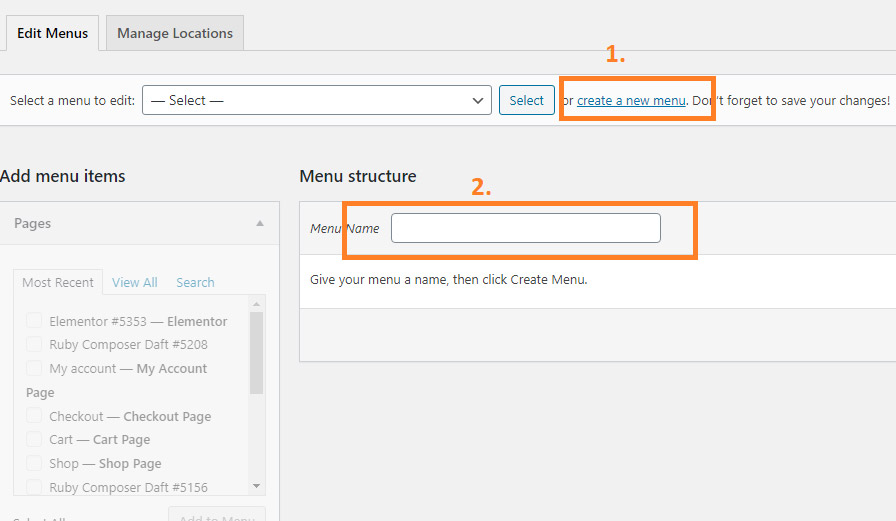
Creating a menu
To create a menu, follow the steps below:
- Navigate to Appearance > Menus.
- Select Create a new menu at the top of the page.
- Enter a name for your new menu in the Menu Name box, and then click the Create Menu button.
- Now you can add items to the menu just created.
Assign your menu to the website
- Switch to the “Manage Locations” tab.
- Then assigns a menu you created into the theme location you want.
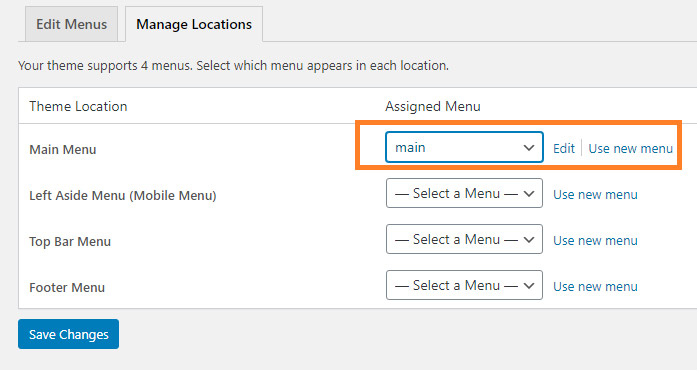
- Click Save Changes once you’ve made your selection.
Menu Options
Pixwell provides menu settings for you can control overall your menu: typography, colors and much more.
Navigate to: Theme Options > Header Settings > Main Navigation.
Refer to How to Config The Header? for further information.