
The theme supports the option to add an icon for each label item. It allows you to add a custom font icon or an attached image/SVG icon.
To add an icon, follow the steps below:
- Navigate to Appearance > Menus > Edit Menus.
- At the “Select a menu to edit” option, you can choose an existing menu or “create a new menu” one to which you want to add an icon.

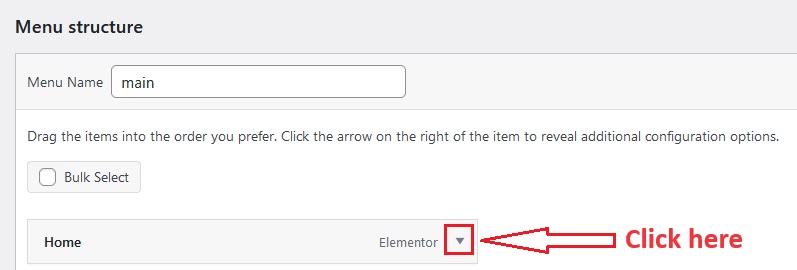
- In the “Edit Menu” section, navigate to the item to which you want to add an icon, and click on the dropdown icon in the top-right corner to reveal the menu item options.
- Then scroll down to the “Menu Icon” section, where you will find options to add an icon.
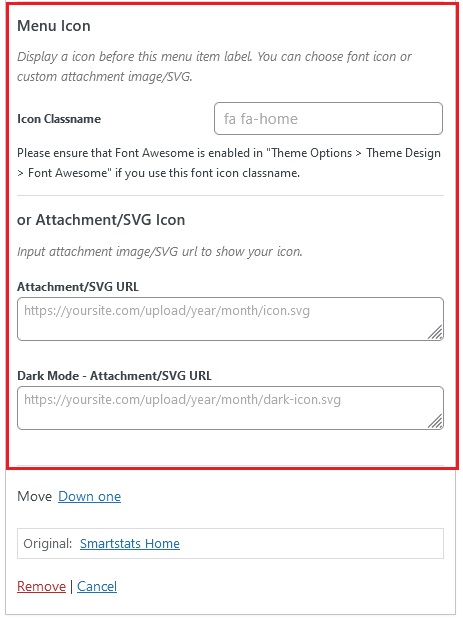
- Icon Classname: this option supports displaying font icons and provides two font options: Foxiz Icons and Font Awesome.
– If you want to display Font Foxiz Icons, simply enter the class name. To find icons based on your preferences, you can refer to this documentation Ruby Icon ClassName
– If you want to display Font Awesome Icons, make sure that Font Awesome is enabled in “Theme Options > Theme Design > Awesome Fonts” if you are using the class names of this font icon. - or Attached File/SVG Icon: input the attached image/SVG url to display your icon.
Attachment/SVG URL: This option displays the icon in light mode.
Dark Mode – Attachment/SVG URL: This option displays the icon in dark mode. If you are not using the dark mode feature, you can leave this option blank. - Click “Save Menu“
Enable Font Awesome to support icon display for this font by following the steps below:
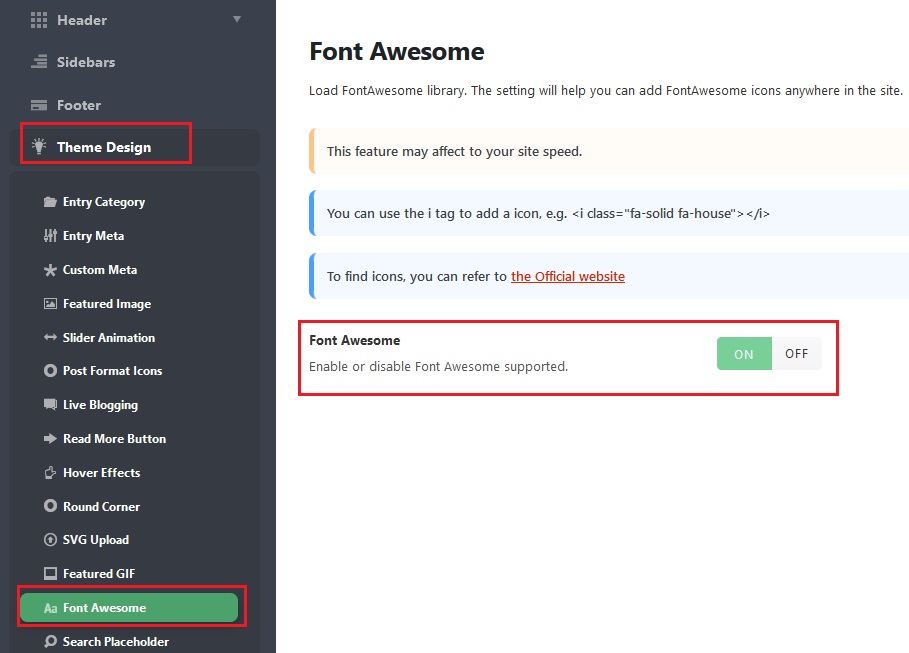
- Navigate to Foxiz Admin > Theme Options >Theme Design > Font Awesome
- In this section, you will find the Font Awesome option. Simply enable it to support this font.
- Click “Save Changes“
