

New feature (Custom Author Gravatar): This allows you to upload a custom image for a user that will override their Gravatar. Below are step-by-step instructions to set up a custom author avatar for any user.
Step 1: Access the User’s Profile
- Log in to your WordPress dashboard.
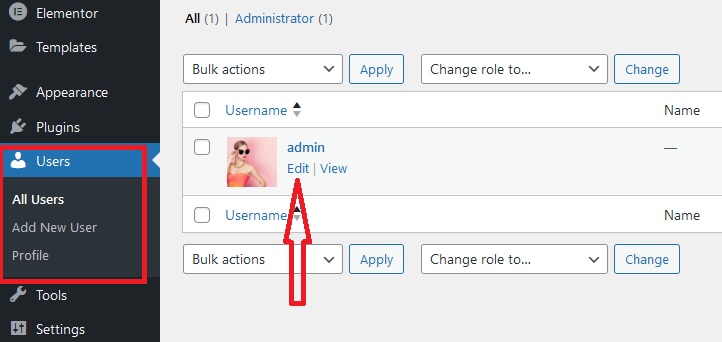
- Navigate to Users > All Users in the left-hand menu.
- Find the user whose avatar you want to customize and click Edit under their username.
Step 2: Locate the Custom Author Gravatar Option
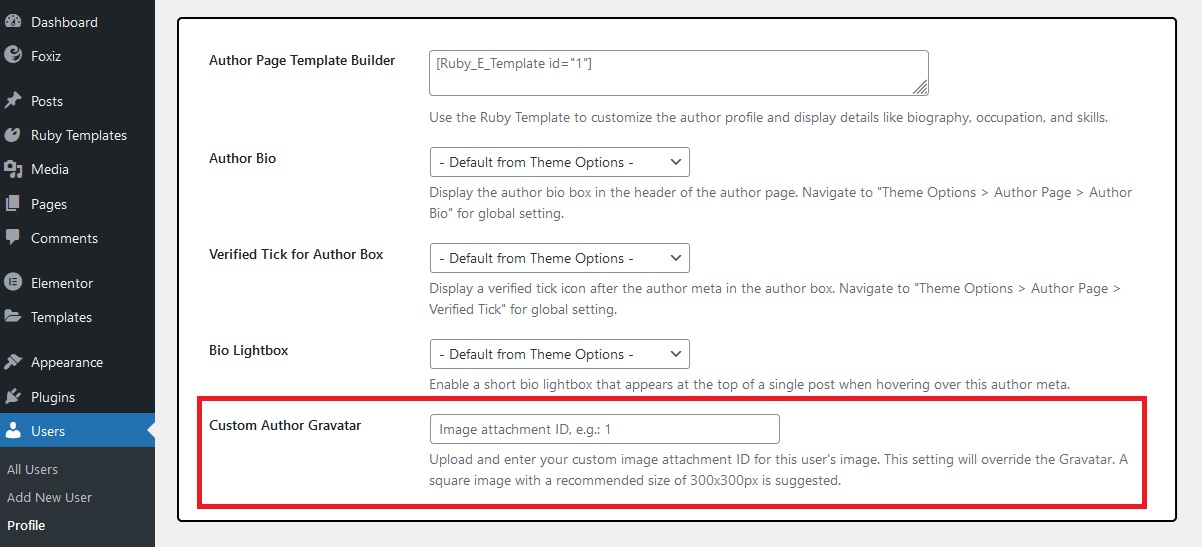
- Scroll down to the Custom Author Gravatar section in the user’s profile settings.
- You’ll see a field labeled: Upload and enter your custom image attachment ID for this user’s image.
Step 3: Find the Image Attachment ID
To add a custom image, you’ll need to retrieve its attachment ID from the Media Library. Here’s how:
- Navigate to Media > Library in the WordPress dashboard.
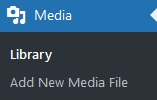
- If the image is not already uploaded, click Add New and upload your desired avatar (recommended size: 300x300px, square).
- Once uploaded, click on the image to open its details in a popup or a new page.
- In the URL displayed at the top of the browser, look for the part that says:
example.com/wp-admin/upload.php?item=2033The number at the end (e.g., 2033) is the Image Attachment ID.

Step 4: Enter the Attachment ID
- Copy the Image Attachment ID you found in Step 3.
- Go back to the user’s profile page and paste this ID into the field under Custom Author Gravatar.
Step 5: Save Changes
- Scroll down to the bottom of the profile settings page.
- Click Update Profile to save your changes.
Notes:
- Ensure the image you upload is a square with a recommended size of 300x300px for the best results.
- The custom image will now display in place of the default Gravatar for this user wherever their avatar appears on your site.
