
The theme comes with the custom meta feature. That allows you to create your own meta label and display in the blog post listings or single post ie:

To Getting started, follow the steps below:
- Navigate to Foxiz Admin > Theme Options > Theme Design >Custom Meta
- Refer to the “Custom Meta” Section.

- Meta Label: Input label text for your meta.
- Meta Icon ClassName: Input the icon name if you want to show before the meta. To find the name, Refer to the font icon: Ruby Icon ClassName
- Is Bold Meta: This meta will be bold if you enable this option.
- Label Position: Select a position for the custom meta label.
- Fallback Meta: Choose a fallback meta if the value of this meta does not exist or has no value.
Add a Value for Your Post
- Navigate to Posts > All Posts, then select the post and click on the edit link.
- Scroll down to the “Single Post Settings” section and click on the “Custom Meta” tab.
- Input a value into Custom Meta Value option.

Showing the Custom Meta
For blocks in Elementor:
- Navigate to Pages > All Pages.
- Select a page you would like to edit or add a new page, and click on the “Edit with Elementor” link.
- The website will redirect to another URL and the panel will appear on the page. Then click the block you would like to edit.
- Select the “Style” tab, then find “Entry Meta”

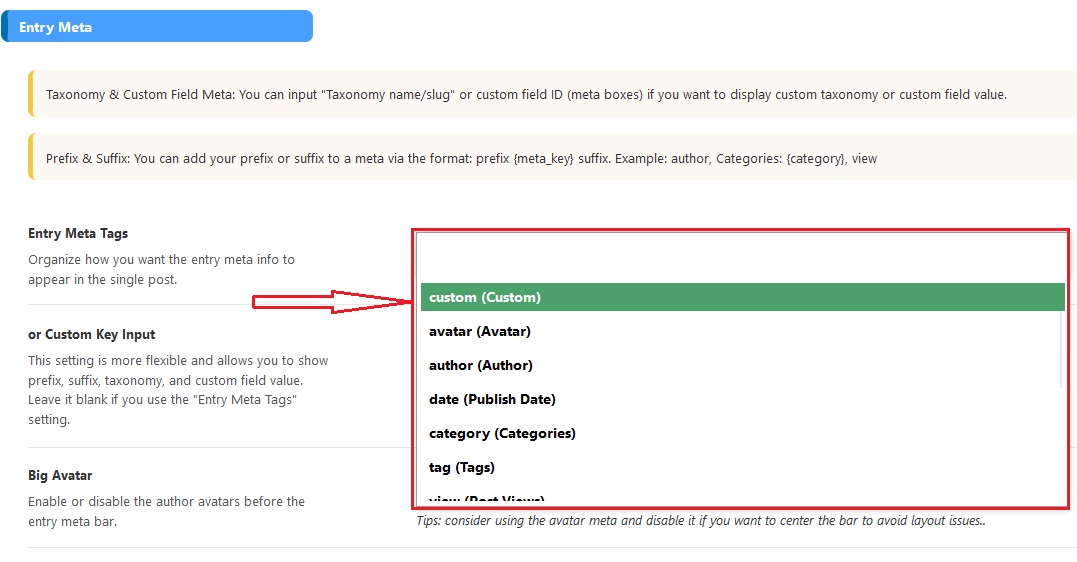
- In the “Entry Meta” section, you will find the option for “Entry Meta Tags”.
- Then input “Custom”.

For Single Post
- Navigate to Your Dashboard > Theme Options > Single Post > Entry Meta.
- Find the “Entry Meta Tags” option.
- Then click on this field option and select “Custom”
- Click on the “Save Changes”